Not Your Ordinary Lemonade

>> June 12, 2011

I recently discovered Two Tarts, another food blog that was introduced to me by my colleague in Articulate which is being maintained by his wife. Very impressed with the photography, I browsed for more pages until this recipe caught my eyes. I immediately fell in love with the idea of lavender on lemonade. I patiently waited for the weekend, but at the same time, I was obsessing about the lavenders. I remembered I saw lavender plants at some sort of market around here but didn't buy once since I don't really know what to use it for. So I went out the next day after reading the recipe to hunt for dried lavender flowers. Unfortunately, I couldn't find one - but later on realized that I wasn't looking hard enough.

On Saturday, I visited the Saturday market close to our house with hopes to find dried lavender flowers. It's a specialty market that sells organic vegetables, and hard to find food items. And there, I finally found my dried lavender :). Luckily, I also found lavender plants so I grabbed them as well ;).

Thanks to Two Tarts for sharing this wonderful lemonade drink, we totally dig it! Lavender was indeed a great addition to a yummy lemonade. I just love the flavor, and the scent. I can smell it in my head hehe.
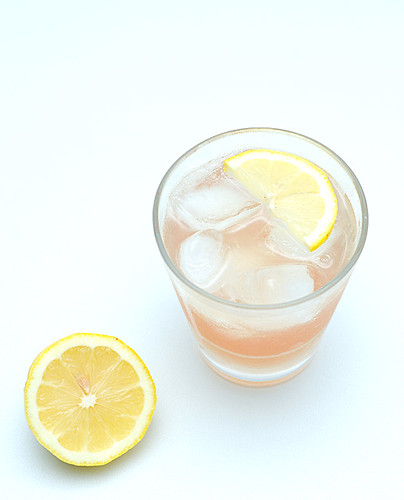


Ingredients:
- Tbsp. dried lavender flowers (you can get it at Salcedo Market on Saturdays, from Spices and Flavors at PHP150 for 50g)
- 1 cup freshly squeezed lemon juice (I used 5 standard sized lemons)
- 1 cup honey
- 2.5 cups water
- Additional 2 cups of water


1. Heat 2.5 cups of water and honey in a pot and bring it to a boil. Stir occassionaly to ensure that honey dissolves.
2. Stir in 1 tbsp. dried lavender and remove from heat. Let it sit in for about 20 minutes, or when it's cold enough.
3. Strain the mixture and transfer it to a pitcher.
4. Add the 1 cup lemon juice and 2 cups of water.

Serve with lots of ice.

You can find this recipe with lots of beautiful photographs of the preparation process at www.two-tarts.com.
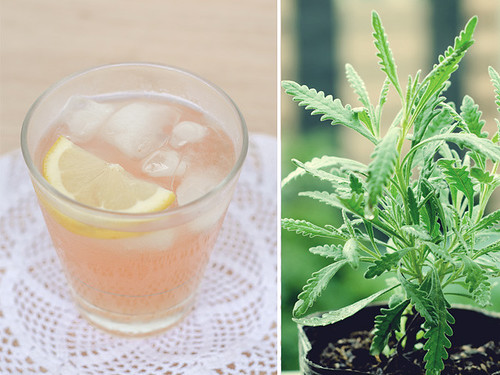

Dedicating this drink to the new member of my herb garden :).

Read more...

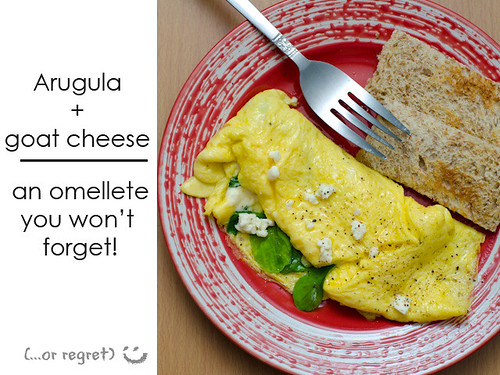
Arugula in Your Omelette

>> June 11, 2011

Inspite of the vast range of breakfast meals, I almost always end up with eggs. Apart from being high in protein, it's very easy to cook - takes 5 minutes. But eggs everyday can get boring. So since we eat eggs a lot for breakfast, I decided to compile all the eggs breakfast I tried and still cooking in a regular basis and so you can as well try it if you are tired of your normal fried eggs in the morning. Let's give that egg life and justice ;).


Ingredients:
- 2 small eggs, beaten (optional: add milk)
- fresh arugula leaves
- goat cheese, crumbled

1. Heat oil in pan. When it's hot enough, pour the beaten eggs and cook them the way you cook an omelette.
2. When it's almost cook but still wet, lay the arugula leaves on one side.
3. Sprinkle goat cheese.
4. Fold the omelette and let it cook for about a minute, in low heat, or until cooked the way you like.

Serve with a piece of bread.

Read more...

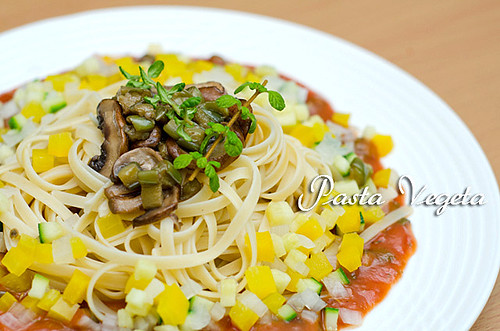
Pasta Vegeta

>> June 8, 2011

When I was young, I was a big fan of Dragon Ball Z. My uncle who used to live and work in Japan used to record the episodes and then send it home so kids in the family can watch it. So even before our local network started to broadcast it, we were already familiar and have watched all the episodes. The only downside was the recordings were in in Japanese, so we kind of learned the story by mere movements of the characters. Funny, but as kids, we were very very satisfied.

Vegeta was one of my favorite characters. I used to associate his name with the word vegetable and thinking it might be connected, until I learned the correct pronunciation of the word "vegetable" . So I'm dedicating this recipe to Vegeta - the villain turned hero who reminds me of vegetables (ve-ge-ta-bols).


Ingredients:
Pasta used : Fetuccini, cooked al dente!

Sauce
- 1 pack tomato sauce
- 1/2 cup water
- 1 long egg plant, chopped in tiny bits
- salt and pepper
- dried oregano
- garlic powder
- dried basil
- 5 pieces swiss brown mushroom, stems removed and sliced
- olive oil

Toppings
- small yellow bell pepper, chopped in to tiny bits
- 1/2 cup zucchini, chopped in to tiny bits
- 1/2 cup white onion, chopped in to tiny bits

1. Boil water in a pot.
2. Prepare a bowl of iced water.
3. Blanch the toppings (yellow bell pepper, zucchini, white onion) in the boiling water for about 30 seconds. Drain and transfer them to the iced water bowl to shock it. Set aside.
3. Heat olive oil in a pan and saute the chopped eggplants. When it is quite golden brown, remove and set aside.
4. Use the same pan and add olive oil again. When it's hot enough, saute the mushrooms until cooked. Sprinkle a little bit of salt and pepper to taste.
5. Heat sauce pan. Add the tomato sauce, 1/2 cup water and bring it to a boil. If you wish to have a thick consistency, add flour to thicken the sauce. I usually dissolve a tablespoon of flour in 1/4 cup water and pour it in. This way I don't have to exert more effort in dissolving the chunks in the sauce.
6. Sprinkle the spices. Add salt and pepper to taste. You may also add sugar if you want a bit of sweetness in the sauce.

To serve:

Get a big plate and pour generous amount of sauce right at the middle. Sprinkle enough egg plant bits. Place the pasta on top of the sauce. Sprinkle the shocked toppings around the pasta and on the sauce. Top the pasta with the swiss brown mushroom. And there, your ultimate vegetarian pasta ;)


smakelijk eten!

Read more...

Help I Have So Much Basil!

>> May 31, 2011

I just trimmed my basil, and I ended up with this:


This is just from one pot. I've got so much I don't know what to do with them. I still have pesto so I can't make more. I need ideas!

Read more...

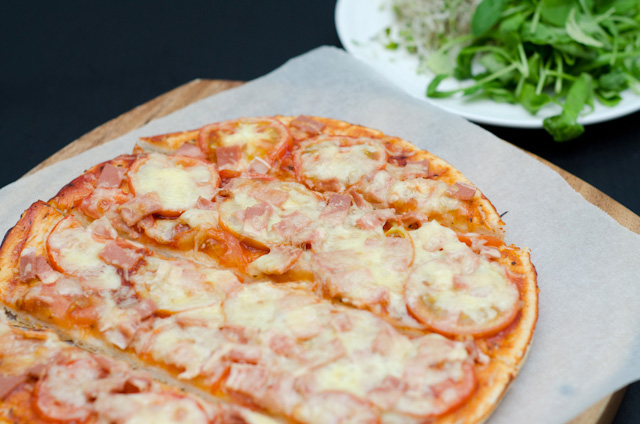
Panizza, But Not Quite


Panizza Pizza was a love a first sight taste experience.

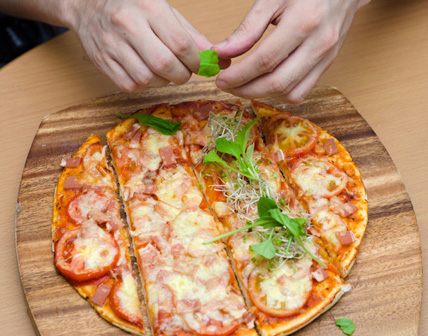
The very first time I encountered panizza was at C Italian Dining, Angeles City, Pampangga, where we held a film shoot for an AVP project. Panizza pizza is apparently the pride of the house. I'm not a pizza person, and so I didn't know what it was or how it's eaten.

Do I eat it with fork and knife? Do I eat it with my hands? But it's cut in a strip. How can I eat it with glamour like that? What's alfalfa sprouts and arugula doing on the table?

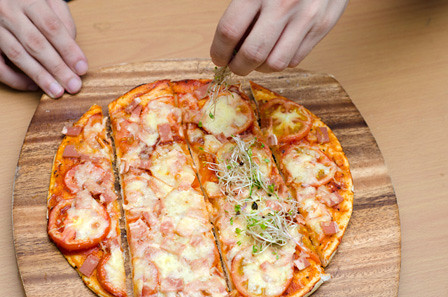
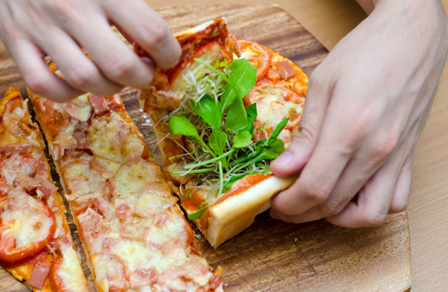
It would be awkward to eat it wrong while you are being filmed, so we asked the kind chef, who prepared all our great food that day, Chef Chris Locher, to tell us how we should execute the eating part :P. So he said, sprinkle the alfalfa sprouts on a strip. Lay the crunchy arugula on top. Roll it. And serve it to your lady like a gentleman.

So we started filming. Mark and I felt awkward at first to be filmed while eating and hearing directions on the sides of what we should do. It was the first time we had an "acting" gig haha! My cheeks where trembling and my hands were tensed. But as soon as I took a bite off that panizza - everything went real and natural. It was so good, I didn't have to act like I like it - because I love it! I think that's the best experience in that entire day of filming. From that moment on, it never left my taste.

This recipe is inspired by Chef Chris Locher's panizza. It's not very close to what he served to us, but this will work for us, for now - until I learn to make my own dough :).

Ingredients:
- a ready made pizza crust (preferrably thin), but if you can make your own dough, do it.
- Del Monte Italian pizza sauce
- slices of ripe tomatoes
- alfalfa sprouts
- baby arugula leaves
- olive oil
- mozarella cheese
- salt and pepper to taste


1. Preheat oven to 200C.
2. Brush the pizza crust with olive oil.
3. Spread the pizza sauce.
4. Spread the tomatoes
5. Sprinkle salt and pepper to taste.
6. Top it with grated mozarella cheese and put it in the oven.
7. When it's ready, slice it in strips, about 1 1/2 inches wide.

To serve:

Step 1: Sprinkle alfalfa sprouts on one strip.


Step 2: Lay some crunchy baby arugula on top.


Step 3: Roll it. (In this case, my pizza crust is too thick to roll so we folded it like a sandwich :P).


Step 4: Munch munch!

Read more...

Another Veggie Evening

>> May 27, 2011


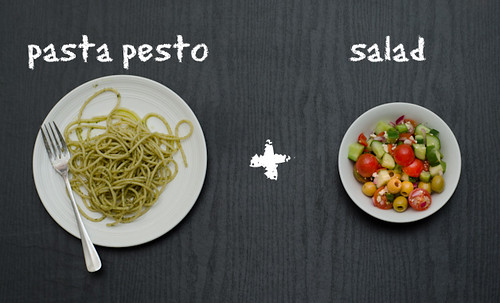
A simple pesto pasta and a nice side salad is perfect for a light dinner. Salad recipe coming up ;).

Eat healthy and have a great weekend everyone!

Read more...

A Taste of Freshness - Mixed Citrus Salad

Not all salad has to have green leafy lettuce. Salads also need not to be strictly all vegetable, or all fruits - you can combine them and it works ;).

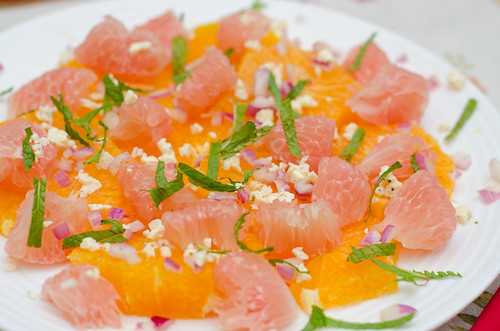
I borrowed a citrus salad recipe from Smitten Kitchen, one of my favorite sites to stalk when it comes to healthy food. I must say it is refreshing and it taste superb. It's nice to have a break from green leafy salad I'm so used to (and i super loveee), and go for some juicy, refreshing fruits.


Mixed Citrus Salad. Forgive my mint for looking dry, I forgot to sprinkle the dressing.

Ingredients:
- your own choices of citrus. In this recipe, I have orange, ponkan and pomelo.
- 1 medium red onion, finely chopped
- 1 Tbsp. red wine vinegar or lemon juice
- 1 tsp. dijon mustard
- 1 Tbsp. extra virgin olive oil
- 1 Tbsp. crushed feta cheese
- fresh peppermint, sliced in to strips


1. Peel your citrus using a knife, removing the white pith or until you see the actual flesh of the fruit. It is quite hard to explain how but click here to view a video of how you can peel an orange with a knife.
2. Put your finely chopped onion in a bowl and rest a strainer on top of it. Slice the citrus fruits and put it in the strainer. In this way, the excess juices would fall on the onion to add flavor and to soften it a bit. I also like to squeeze the juice of the "rejects" slices (slices that aren't so pretty :P) on the onion to add more liquid.
3. In a separate bowl, whisk the redwine vinegar (or lemon juice), mustard, olive oil together. Add a dash of salt and pepper to taste. I also like adding a little bit of honey to give it a sweet twist.
4. Get a big flat plate and layout the citrus fruits. Scoop out the red onion and spread it out. Sprinkle the half (if it's a lot) of the juices from the onion bowl too.
5. Drizzle the dressing (red wine vinegar + dijon mustard mixture) all over.
6. Top it off with crushed feta cheese and mint strips.

Bon apetite!

Read more...

Tricolore Omelette and My Breakfast Complement

>> May 17, 2011

I was supposed to take a break from taking food photographs for at least a week because I'd like to stay away from distractions and just give my 100% attention to my testing job. I could only think of the beta version we'll be deploying very soon, and I must say I am getting more nervous and excited each day. Nervous because I don't want to screw it up by missing important areas to test; excited because it's an ass-kicking software which will take the e-learning industry to the next level  ;)

Despite the lack of sleep and rest from working all night, I was feeling inspired to cook and take photos this morning. Yesterday I was stalking reviewing the recipes of Elena, the blog owner of Photogenic Food : Quick and Easy Recipes. I stumbled upon her blog while testing out google search and trying keywords to pull up my newly bought domain, which contained the word "Photogenic". I immediately fell in love with the simplicity, easy to cook/prepare attitude of this blog - not just the cooking part, but how Elena presented these recipes.

Her mozarella and tomato omelette caught my eyes. It reminded me of tricolore salad, one of my many favorites. Inspired by her recipe, I made my personal version (actually i was just pushed to freestyle because I didn't realize I don't have enough eggs to follow her recipe :P ).

So I'm going to call it Tricolore Omelette.

Ingredients:
- 1 egg, beaten
- 1 Tbsp of milk
- 1 small tomato, sliced
- mozarella cheese (grated or thinly sliced)
- fresh basil leaves
- salt and pepper to taste


1. Beat the eggs. Add milk. Sprinkle salt.
2. Heat oil in a pan. When it's hot enough, pour the egg mixture.
3. While egg is cooking, top it with mozarella cheese. If you have thin slices, just distribute it evenly. Make sure you don't put too much as you don't want to overwhelm your omellete with cheese. Distribute the tomato slices as well.
4. When it's ready, or the mozarella has melted, fold the egg just like how you normally fold an omelette.
5. Sprinkle pepper and serve with fresh basil leaves.


On to my second inspiration source...

Mark's first magazine cover was just published! We just got a copy and I'm feeling super thrilled seeing the photos he made published in front page, and all over the magazine. He's had a number of shoots with Monday, but this is the first time he got to shoot the cover, and being on the cover is really something. I feel proud to see Mark's work on a magazine cover - and mind you, it's not just a so-so magazine :). Thanks to Monday for giving Mark this opportunity. Very happy to see that his hardwork - the consistency of delivering high-quality, professional photographs paid off :).  So this morning, Monday Magazine was the perfect complement for my tricolore.

Dingdong Dantes is definitely a yummy breakfast. Aruguuuy! (quoting elvira and iya)

My Pupi is popular :D

Isn't she lovely?

Read more...

Bubble Blahs

I work and live at night time. I am a person deprived of natural light. I rarely cook in the morning as I'm almost always asleep, else busy with house chores. As much as I love natural light in my photography, I'm afraid I don't usually have that luxury, unless I sacrifice my sleep, or make an effort to stay up longer during the day to do a cooking + photo session. So I depend on my flash, and sometimes, available light from my fluorescent bulbs. Although, in my opinion, nothing beats the natural light, I am, so far, satisfied with my shots using my flash that I learned to love.

I always look forward to the weekends for some sunlight.

  © Blogger template Simple n' Sweet by Ourblogtemplates.com 2009. Sponsored by: Website Templates | Premium Themes. Distributed by: blog template

Back to TOP