Holland Holidays!

>> December 21, 2011

Yes, I have been quiet and lazy and neglecting this blog and photography. The truth is, I've been busy freezing my ass here in Holland :P. I haven't done anything cooking related because my mother in law has been pampering me and Mark with good food! I'll be here for a month and planning to do more food related activities and shopping in the coming weeks after the hectic Christmas and our Dutch wedding - yes, we are holding another wedding celebration, this time with Mark's family and friends who didn't make it in the wedding celebration in Manila.

Anyways, I plan to get like top 5 or 10 Dutch food that I love and make nice photographs of it. I also plan to visit vintage shops and hunt for nice, unique food styling props. But actually, the #1 in my list is to visit IKEA! oh yeah!

Have a great holidays everyone! Enjoy this time of the year with good food and great company!

Read more...

Cendol, Anyone?

>> December 1, 2011

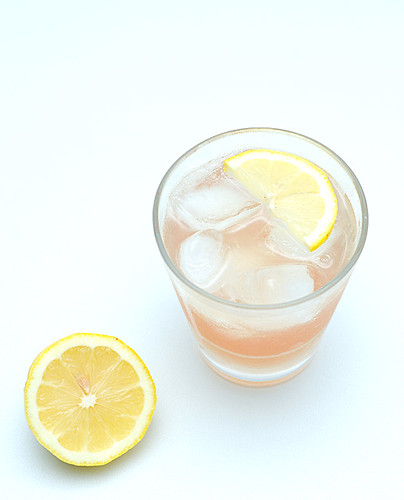
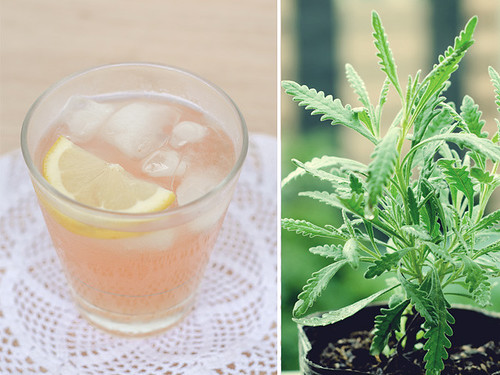
I wish I made better photos, but the ice quickly melts!
After hundreds of grams of rice and tapioca flour wasted, underarm pains and sweat, and numerous failed attempts, not to mention the horrific clean-ups, I finally succeeded in making cendol! Wee!

I first learned about cendol in Holland, during my summer visit in 2009. It was funny to have the first taste of this asian delicacy in a western country, when I have lived all my life in Asia. Es Cendol is a green, worm-like jellies made from rice flour, tapioca flour and mung bean flour served with coco palm sugar syrup, coconut milk and shaved ice, topped with jackfruit - a very popular drink/dessert in Indonesia. Cendol was a love at first taste experience. I was in constant search for it here in Manila, but unfortunately, it's not available anywhere. I find it odd that I could never find it in any of my favourite Asian restaurants around the city when it is super popular in Indonesia, Malaysia, Thailand and Vietnam, our neighboring countries.

Finding the right ingredients was a bit of a challenge for me though - gula jawa and mung bean flour in particular. I scoured all specialty Asian shops for these and didn't have any success. Nevertheless, I found coco sugar, the closest alternative I can get for gula jawa, although in my opinion, gula jawa's sweetness complexity still is the best. I gave up on mung bean flour and settled for the rice flour and tapioca flour combo - which ended up in a disaster. My cendol just melted a few minutes after it's submerged in the ice water. Although most Indonesian cendol recipe say it's just rice and tapioca flour, for some reason I couldn't succeed. So I thought the mung bean flour was the only key, and I don't have it. After numerous attempts with rice flour and tapioca flour in different proportions, I finally called it off and decided to wait on my cendol dreams. But thanks to 
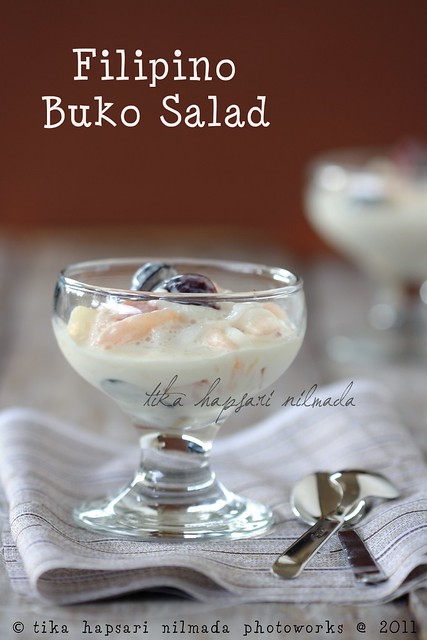
Tika, she revived my cendol hopes and sent me that precious mung bean flour - straight from Indonesia. I finally made my first successful cendol! My cendol hopes and dreams would have died if it wasn't for Tika, thank you so much dear!

After browsing for numerous cendol recipes and videos, I was lead to Almost Bourdain, which has a simple recipe for the cendol jellies. I tweaked it a bit according to my taste, and it did work(oh geez, it's about time!).

So here's my take on cendol! Hope you like it :).

Ingredients:

Cendol Jellies
- 80g mung bean flour
- 500ml water
- green food coloring
- pandan leaves (or pandan flavor)
- 3 tbsp white sugar
- iced water in a bowl
- colander

Coconut Milk
- Kara Coconut Cream (or better, fresh coconut and get the "kakang gata" or the first milk)
- pandan leaves
- salt

Syrup
- 250 coco sugar, or coco palm sugar
- 250ml water
- Pandan leaves

Cendol Jellies Preparation:
1. Dissolve the mung bean flour in 500ml water.
2. Add few drops of green food coloring until you reach the color of electric green. You may also use pandan leaves to make the color natural.
(To do this, put pandan and 500ml of water in a blender. Sieve and take the liquid extract and use that to dissolve the mung bean flour).
3. Add sugar and 1 tbsp of pandan flavor, stir until dissolve.
4. Set your stove in low heat and begin stirring the mixture in a pot. Continuously stir until it thickens.
5. When it's paste like and super thick turn off the heat and get ready to mold!
6. Put the colander on top of the iced water.
7. Pour the cendol thick mixture on the colander and start scraping back and forth with a use of a spatula. The holes in the colander will serve as your mold to make that little green worms. DO NOT WAIT TOO LONG, otherwise when it gets cold it will be hard to mold.
8. When done, set aside.

Syrup Preparation.
1. Combine coco sugar and 250ml water in a pot, in low heat.
2. Stir until sugar's dissolve.
3. Make a knot out of about 4 pandan leaves and simmer it together with the sugar. If you don't have pandan leaves, just add 1 tbsp of pandan flavor.

Coconut Milk Preparation.
1. Heat the coconut cream (kakang gata) in a pot using low-heat.
2. Add about 2 tbsp. pandan flavor, or make a knot out of pandan leaves and put it in the milk.
3. Add a dash of salt.
4. Turn of the stove when it starts to bubble.

To serve:

In a glass or bowl, layer it with coco sugar syrup, cendol jellies, crushed ice, and coconut milk. You can top it with fruits like langka (jackfruit) or banana. Add more cendol jellies on top if you wish.


This cendol jelly is noodle type, where I poked a hole in a plastic bag and piped the cendol mixture in it. If you do this, try to not wait to long because cendol is hard to pipe out when it cools down. Don't forget to also wear mittens because the plastic gets super hot :).

Read more...

Creamy Spinach on Sweet Potato Latkes

>> November 29, 2011

I tried to reinvent the sweet potato latkes I made previously to give it a better appeal. It turned out that it works great with creamed spinach, and of course, my never dying love for poached eggs :).

To make the sweet potato latkes, please refer to this blog post.

And now, for the creamed spinach:

Ingredients:
- a bunch of fresh spinach, plucked and washed thoroughly
- 1 tbsp butter
- 1 tbsp all purpose cream
- salt and pepper to taste

1. steam or parboil the spinach until withered. Shock it with cold water when done and squeeze the excess water from it.
2. Heat a little bit of olive oil in a pan before you put the butter. This way, the butter won't get burned.
3. Add the spinach and saute.
4. Add the all purpose cream. You can add more cream if you feel like it's still a bit dry, although you don't want it to runny/creamy. Saute for about 2 minutes.
5. Add a dash of salt and pepper to taste.

Top your sweet potato latkes with it, plus a nicely poached egg.


Read more...

Instant Semi Healthy Refreshment

I don't think any food shoot will happen today. I woke up with a super dirty house and just finished cleaning the living room, and still have to do the bathroom and bedroom. I'm exhausted now to even think about what we'll have for dinner.

So while I was relaxing an hour ago, I remembered a simple drink I browsed from Mylene's tumblr blog. It's a strawberry drink with just water, lemon, honey and sliced strawberries. I thought it was a perfect refreshment after a tiring session of sweepings and moppings. But I had a better idea. Yesterday we dropped by at my favorite store, the Japan Home Center, where everything is bargained. I bought a couple of flavored sparkling water and thought it would be nice to use it rather than just water for this lovely strawberry drink :).


Ingredients:
- sparkling flavored water (or just regular water)
- a slice of lemon
- 2 Tbsp of honey (or more, depends on how sweet you want it)
- Slices of strawberries
- ice cubes


1. Wash and slice the strawberries and put it in a glass.
2. Add the sparkling flavored water (or water).
3. Squeeze the slice of lemon.
4. Add the honey and mix well.
5. Serve with ice cubes!


I called it semi-healthy refreshment because I used sparkling flavored water :P.

Read more...

Scrambled Tofu

>> November 21, 2011

I first got the idea of making a scrambled tofu from The Kitchenist, while searching for tofu recipe. Tofu is one of  my many favourites, but I'm seriously tired of deep frying them all the time, since it's the only way I know how to prepare it. So I got excited to try the scrambled tofu, and curious how it would turn out.

I tweaked the recipe a bit and made it more personal - I added more ingredients and other spices. I used silken (soft) japanese tofu with these, although in my opinion, it would have had a better texture if I used the firm one, which is usually used for deep frying. But over all, it's very yummy. It's like a substitute for egg scrambled, if you are vegan :).


Ingredients:
- 1 silken tofu (or firm), drained and crumbled
- 1 small green bell pepper, chopped
- 1 small red bell pepper, chopped
- 1 medium white onion, chopped
- 1 stalk of celery, leaves separated and chopped
- 1/3 cup frozen peas
- spanish paprika
- ground coriander
- salt and pepper

(note: do not over crumble the tofu as you would want to preserve some chunky texture).


1. Heat oil in a pan and saute onions until soft.
2. Toss in the red and green bell pepper.
3. When the pepper is a bit soft, toss in the green peas.
4. When the green peas is soft and cooked, add the tofu and mix well.
4. When the tofu is almost dry, add the celery stalks.
5. Start seasoning it with salt and pepper according to your liking. Add a dash of ground coriander and spanish paprika.
6. Toss in the chopped celery leaves and mix well.

Serve with toasted bread. Serves 3.

Read more...

Zucchini and Carrot Mini Pancakes with Poached Egg

>> November 17, 2011

This food presentation from Seven Spoons totally inspired me to make a nice similar breakfast today. Yese, I'm not over with poached eggs fever :).


Ingredients:
- 100g chopped zucchini
- 4 pieces zucchini sliced thinly (optional)
- 4 slices carrots, thinly sliced (optional)
- 100g chopped carrots
- 2/4 cups bread crumbs
- 1 large beaten egg
- 1 egg for poaching
- 1/8 cup melted butter
- some spanish paprika
- salt and pepper
- alfalfa sprouts for garnishing


1. Combine the zucchini, carrots, bread crumbs, melted butter and beaten egg. Mix well.
2. Add salt and pepper according to your taste. Give it a dash or two of spanish paprika.
3. Put the mixture in a food processor. Do not puree, just give it about 5-10 seconds chopping/blending. It's still nice to have a little bit of chunks.
4. Heat oil in a frying pan.
5. Use an egg mold to hold the batter. Pour a little bit of the mixture inside the mold, and then top it with the thinly sliced zucchini. Then top it again with the mixture.
(note: I usually set the oven heat medium to low, so I can evenly cook even the inner portion without burning the outter part.)6. Flip to the other side when firm enough and cooked. Do this to the rest of the mixture.
When everything is cooked, you can then poach your egg.
To serve:
1. Get one pancake and spread some garlic mayo.
2. Sprinkle some alfalfa sprouts. Arugula also works with this.
3. Top it again with another pancake. Sprinkle some alfalfa sprouts (or arugula) and then top it with the poached eggs.

Sunshine on a plate :).

Read more...

Vegetarian Eggs Benedict

>> November 2, 2011

You might say, poaching an egg is very simple and nothing to get excited about. But for some reason, since I just learned it recently, I'm almost always thinking of any recipe that would let me poach an egg. Weird, but I just love 'em.

This recipe is adapted from Sprouted Kitchen, another wonderful vegetarian recipe avenue that I found by browsing numerous food blogs that has become my habit every time I feel like cooking.

So aside from the poached egg as the main ingredient that caught my attention, the asparagus caught my eyes. Not only that it's one of my many favourites, but it always reminds me of my good friend Dave, who told me that asparagus makes your pee stink. Thanks to Dave, every time I eat asparagus, I have this idea in my subconscious and I suddenly become observant when I have to do #1 after eating. Well, I'm not going to tell you if it's true or not - see for yourself :P.

About 4 months ago, Dave sent me a nice food styling techniques hand book and I remember promising that I'll dedicate one food photograph for him as a token of my appreciation. It's been 4 months, but it's better late than never, eh? So here, a very good timing - I'm dedicating this photograph to him, for sending the hand book + for the asparagus trivia :).


Ingredients:

- 2 English Muffins
- 2 large eggs
- 1 1/2 cup spinach leaves, washed and drained
- 8 spears of asparagus, cut in half (in this recipe, I used the short thin asparagus)
- lemon zest from 1 small size lemon
- salt and ground pepper


Bell Pepper Sauce
- 1 medium sized bell pepper, roasted and skinned (red, green or yellow)
- 1/4 cup milk
- 3 oz goat's cheese
- 1 Tbsp. lemon juice
- 1 Tbsp. dijon mustard
- 1/2 tsp Siracha hot sauce (optional)
- salt and pepper to taste


Sauce preparation:

1. Cut the bell pepper in half and roast it in a toaster. You'll know it's ready when the skin begin to blister. Let it cool down.
2. Remove the blistered skin. Chop in to small pieces.
3. Put the bell pepper in a blender or food processor. Add the milk, cheese, mustard, lemon juice, and hot sauce. Blend well until smooth.
4. Put the sauce in a small bowl and add salt and pepper according to your taste. Set aside.

Eggs Benedict Proper:

1. Heat oil in a pan (olive oil preferred).
2. Fry the asparagus until the color become vibrant. Sprinkle a little bit of salt and pepper. Careful not to over cook as you would like to preserve the crunchiness. Set aside.
3. In the same pan, saute the spinach and lemon zest until the spinach is wilted, but not overcooked. Sprinkle a bit of salt and pepper to taste.

Then poach your eggs.

To serve:

(from bottom layer to top)
English Muffin -> Bell pepper sauce -> Spinach -> Asparagus -> Poached Eggs -> Bell pepper sauce again.

Serves 2. Hubby approves!

Now that I'm very satisfied with my vegetarian eggs benedict, I feel more confident and deserving to post the Heart Locket Blog Award that Tika sent me :).


A few pointers if you get this award:

1. Pass it on to 7 other blogs.
2. Put in the award picture in your post.
3. Don't pass the award back to the award giver.
4. Answer the questions below and post them in your blog.

Questions:
1. What makes you feel great about yourself?
2. Who inspires you most? Also be more specific, which qualities inspire you, in each person? You can list as many people you like.

My answers:
1. Healthy food, nice pedicure, groomed eyebrows, coco butter all over, and appreciation from the people I care for :).
2. I'm usually inspired by most people who doesn't even know they inspire me, or doesn't know me at all. I take inspiration from their works, experiences and accomplishments. I'm influenced heavily by people who aim for the highest quality in whatever they do.
 
I only know a handful of people in the blogging community (2 in cooking/food subject, to be specific :P), but I'd like to give it to the 7 top blogs I visit - not just for good food, but also for great food photographs!

1. Cook, Eat, Live Vegetarian
2. Sprouted Kitchen
3. PhotoKitchen Food Photography
4. Green Kitchen Stories
5. Ellen Silverman Photography
6. Two Tarts
7. 101 Cookbooks


Read more...

Lekkericious Overhaul

>> October 30, 2011

Lekkercious needs an overhaul. I'm planning a couple of changes - mostly aesthetics. Please stay tuned!

Read more...

Vegetable Tempura

>> October 25, 2011


After learning how to make a proper tempura batter and dip, this has become one of our top favorites. I first got the inspiration to make some vegetable tempura from Natalie's kitchen, Cook Eat Live Vegetarian, my #1 avenue when I run out of dinner ideas.


Here are a number of vegetables you can use for your vegetable tempura:

- Green french beans
- Carrots
- Aubergines
- Okra
- Potatoes/sweet potatoes
- Onion rings
- Mushrooms
- Peppers

Natalie's blog led me to Naomi's recipe where it contains the simple recipe how to make the batter and dipping sauce, plus a youtube video that taught me a very handy technique to fry the veggie tempura.

So here it goes!


Dipping Sauce:

- 1/3 cup dashi (or 1/3 cup water + 1/2 tsp. Hondashi)
- 3 Tbsp. kikoman soy sauce
- 2 Tbsp. sake
- 2 tsp. sugar

1. Simmer the ingredients in a sauce pan to dissolve the ingredients.
2. When it's boiling, remove from heat and set aside.

Tempura Batter

- 100 g all purpose flour
- 1/2 tsp. baking powder
- 1/4 tsp. salt
- 1 egg yolk, beaten
- 200 ml ice water
- Cornstarch for dusting
- Vegetable oil for deep frying

* Chop your veggies. If you are including french beans, tie about 6 pieces using chives to keep it together. After vegetables are ready, heat up your cooking oil. While waiting, prepare your batter.

1. Put all dry ingredients together in a mixing bowl. Whisk it.
2. Add the ice water in the bowl of beaten egg yolk and blend. Put 2 ice cubes in it. It's important to keep the mixture cold because the crispiness relies on this.
3. Add the egg mixture to the flour mixture. Mix them using chopsticks, in one direction, for about 10x. It's ok to have some chunks in it. According to Naomi's recipe, the idea is to not produce gluten to make a crunchy tempura.
4. Dust off your vegetables with cornstarch.
5. When the oil is hot and ready, dip the veggies in the batter and fry away. Do not over crowd the frying pan.

Here's the video of the frying technique I was talking about. What and learn.


Happy eating!

Read more...

I Got a Heart Locket From Tika!

>> October 17, 2011

... a Heart Locket Blog award :)!

I'm super psyched to make a great food picture, whether it's just a simple meal or what not, before I post the cute award icon.

Thanks Tika, I feel honored and happy to receive this from you :). It inspires me to make good food photographs. Lately, I've just been clicking away and just only concerned in showing the outcome, but not really spending time in composition and styling - and that's because I'm often impatient out of hunger :P. I want to shoot, get over it, and eat!

So hopefully, I can make good ones in the coming days :).

Read more...

Grilled Tomatoes and Asparagus Salad

This dish was inspired by an asparagus salad dish we tasted from Malcom's place (I can't find their website). I executed the way I remembered how it tasted, and luckily, Mark approved! So I'm posting it :P.

We both didn't know how to make poached eggs, but thanks to YouTube, we learned in 5 minutes.


Ingredients:
- 1 bunch of short stemmed fresh asparagus, bottoms cut
- 7 pcs of cherry tomatoes, halved (or you can add more if you wish)
- 5 cloves garlic, finely chopped.
- olive oil
- eggs
- salt and pepper to taste
- feta cheese (optional)

1. Heat olive oil in a pan.
2. Add the garlic and saute until golden brown. Do not burn it, it will become bitter. Put it in a bowl and set aside.
3. Grill the asparagus and cherry tomatoes until you see nice char marks on it. I used a griddle pan to do this. Set aside.
4. Pour a little bit of the garlic oil on the vegetable - just enough to give it a garlic flavor. Toss well.
5. Sprinkle salt and pepper according to your taste.
6. Take some of the roasted garlic and sprinkle it on the vegetable mixture. Again, toss well.
7. Arrange the vegetable in a small plates (for serving) and set aside.
6. Poach your egg.
8. Lay the poached egg on top of the vegetables. Sprinkle some feta cheese and serve!

Read more...

Stir-fried KangKong with BambooShoots

>> October 13, 2011


Ingredients:

- 1 bunch of Kangkong (swamp cabbage)
- 1 small can of bamboo shoots, cut into strips (if you can't get it fresh)
- 3 cloves garlic, finely chopped.
- 1 small red onion, chopped.
- 2 tbsp Kikoman Soysauce (or regular soysauce)
- salt and pepper to taste
- 1 tbsp sambal oelek (optional)


1. Remove the leaves and include young crunchy steps of kangkong. Wash thoroughly and remove excess water.
2. Heat oil in a wok. Fry the onion until a bit soft, then add the garlic. Saute until golden brown.
3. Toss in the bamboo shoots and give mix it well.
4. Add kikoman soysauce and mix well.
5. Add the kangkong and toss well. The kangkong is cooked when the leaves starts to wither.
6. Add salt and pepper according to your taste.
7. Add the sambal oelek to give it a spicy kick.

Serve hot with steamed rice :).

Read more...

Birthday Letter From Mark

>> October 9, 2011

I was feeling extra lazy since this morning. I just want an easy Sunday, bum around with my cats, sleep in, and spend a quiet evening with Mark. Besides, I seldom celebrate my birthdays - and it's not because I don't like the fact that I'm getting old - I am just like that. Funny how I take more enjoyment planning Mark's birthdays and other less meaningful occasions like Valentine's day, house warming, or meetsaversary (which we just invented) than my own special day.

This evening, Mark woke me up from a nap with a very cute letter, printed in a special textured paper.

Dearest Pupi,

Today you have completed 29 trips around the sun! It's time to have a big slice of cake and celebrate! This year we are taking it easy. no big party so no mix and mingle with your friends, just the 2 of us. We will find a nice resto & blend into the scenery there while we enjoy the food. You wanted to stay in and whip up a nice meal in your kitchen which I love, but today your cooking must grind to a halt so that you can rest and enjoy your special day. So go get ready, chop chop, and let's have a nice evening together pupi. I have a feeling it will be grate!

Love forever,
Pupi

The words slice, mix, blend, whip, grind, chop, grate were all printed in bold, like some sort of subliminal message. After reading it out loud, Mark brought his present, a multi-purpose food processor! Yay! It's so cute how he made way to get these words describing a food processor put it all together in a form of letter and make it jive altogether.

I joked that the letter should end with "Love forever, Imarflex".

You can call it cheesy - but I call it creativity! Love you pupi!

Read more...

Vegetarian Pinakbet

>> October 5, 2011

My taste bud's been missing a lot of my favorite Filipino dishes lately. I can't cook them since they all have meat in them. You can't have tinola without the chicken, sinigang, caldereta, dinuguan, binagoongan, and sisig without pork or beef.

I kept thinking of famous Filipino dishes that doesn't involve any amount of meat that my head started to ache, when I suddenly realized, hey why deprive myself of my Filipino favorites when I can try cook them without the meat? I certainly can't cook my top favorites I mentioned earlier without the meat, but that shouldn't stop me from trying to cook my other favorites, meat free right?

Pinakbet is one of my favorites. I used to order it in every Filipino restaurants we dine in each time. It's always on the table! Pinakbet have shrimp paste and pork, but I skipped those two in this recipe, replaced the pork with tofu to make it vegetarian friendly.


Ingredients:
- 1 firm tofu, fried and chopped in to cubes
- 1 small red onion, chopped
- 3 cloves garlic, finely chopped
- 200g Kalabasa, chopped in to cubes.
- 100g Ampalaya (bitter gourd), deseeded and sliced
- 4-5 pcs Okra, sliced in two (or three if it's long)
- 100g String beans, cut about 2 inches long
- 1 pc long eggplant, cut in to 4 parts
- 2 pcs tomatoes, quartered
- 2-3 tbsp soy sauce
- 1/2 cup water
- salt and pepper

Note : To remove some of the ampalaya's bitterness, rub it with salt and let it sit there for 10-15 minutes and then rinse it.

1. Parboil the Kalabasa, careful not to overcook. Set aside.
2. Heat oil in a pan and fry the chopped eggplants, turning to the other side when it's slightly browned. Do not over cook.
3. Heat oil in a wok. Saute garlic and onion until garlic is almost golden brown and onion is soft.
4. Add the ampalaya and stirfry for about 15 seconds.
5. Add the sliced okra and tomatoes and stir fry for another 15 seconds.
6. Add the kalabasa and fried eggplant, and string beans. Mix well.
7. Pour 1/2 cup of water and 3 tbsp of soysauce. Mix well.
8. Sprinkle salt. The original pinakbet is sauteed with shrimp paste which makes it salty, so gradually adjust the saltiness to imitate the saltiness of the shrimp paste.
9. Stir fry for a few more minutes until you see the colors of the veggies become vibrant. If it gets too dry, just add another half a cup of water and adjust the saltiness accordingly.
10. Lastly, add the fried tofu. The tofu is used to replace pork in the dish.

Serve it with hot steamed rice.

Serves 3-4 heads.

Read more...

Curried Green Beans in Coconut Milk

>> October 4, 2011

Ingredients:

- 200g green beans, chopped into small diagonal pieces
- 3 cloves garlic, finely chopped
- 1 small red onion, finely chopped
- 1/4 cup coconut milk
- 2 tsp. yellow curry powder
- 2 pc long peppers, deseeded and sliced (red is preferred)
- 1/4 cup vegetarian ground meat (optional)
- salt and pepper to taste


Note : I am unfamiliar with pepper families, but the one I used here is the "pan-sigang" type, which is not that spicy. If you can find red pepper (not labuyo please!) that's also not that spicy, use that one instead so you get color contrast.


1. Heat oil in a wok. Saute onion and garlic until onion is soft and garlic is golden brown.
2. Add the vegetarian ground meat. Cook until fried and golden brown. (Skip this part if you won't use any).
3. Add the green beans and saute for about 30 seconds, and then the peppers.
4. Add the coconut milk and yellow curry powder. Mix well.
5. You'll know the beans is cooked when the green color becomes vibrant. Be careful not to overcook the beans as it's nice when it's crunchy. The coconut milk will be absorbed by the beans and it won't be saucy.

Serve with steamed rice!


Read more...

Indonesian Dessert : Bubur Sumsum

Last week I've been obsessing on making Indonesian cendol from scratch - and failed miserably, thrice :P. So I decided to give it a rest and set it aside until I find the ingredient I'm missing.

Because of that, I'm stuck with a lot of rice flour. And it seems that I haven't let go of the Indonesian dessert obsession, I browsed through my friend's blog, Tika, and remembered my interest in one of the food photograph she posted awhile back, the bubur sumsum - Indonesian rice pudding. So I immediately googled and found a youtube video from Indonesianfoods on how to make it. Now I get to use my rice flour!

Ingredients:
- 50g rice flour
- 1 1/2 cup coconut milk (kakang gata)
- 200g Coco Palm sugar (or Palm sugar if you can find one)
- 1 cup water
- pinch of salt
- 2 tsp. vanilla extract
- jackfruit (optional)

Coco Palm Sugar Syrup.
1. Set the stove in low heat.
2. In a sauce pan, pour 200g coco palm sugar and 1 cup of water. Stir.
3. Keep on stirring until the sugar is dissolved, and it starts to simmer.
4. Remove from heat and set aside.

Rice Pudding.
1. Combine rice flour and coconut milk in a mixing bowl and mix well, until the rice flour is dissolved.
2. Place a pot under low heat and pour the rice flour mixture and give it a stir.
3. Add a pinch of salt and 2 tsp. vanilla extract.
4. Continuously stir until it's thick and cook.

Rice pudding and coco palm sugar syrup. And yes, those are cat legs interfering with my set.
To serve:
You can either use a bowl or a wide mouth short glass for this (as seen on youtube and blogs :)). Scoop out the rice pudding and put it in the glass/bowl. Then pour some coco palm sugar syrup and top it with some fruit if you have any. Jackfruit goes well, but since I don't have it, I'm using kiwi.

You can serve it warm or cold, however you want it.

Read more...

Meat-Free Arroz Caldo

>> September 29, 2011

Who said you can't have Arroz Caldo without the chicken?

A lot of you might say that Arroz Caldo is not an Arroz Caldo if there's no chicken in it. It's the chicken that gives Arroz Caldo its life. I mean no disrespect to this timeless recipe (it's one of my favorite Filipino merriendas) but I did make one without the chicken - and I even skipped the mandatory fish sauce :P. Hey! Vegetarians also have the right to enjoy the yummy arroz caldo, specially in this kind of weather we are having lately - rainy and grey. Perfect for a hot tasty arroz caldo!

Ingredients:

- 1/2 cup white rice
- 1/2 cup sticky rice (glutinous rice)
- 6 cups of water (or vegetable stock)
- small ginger, cut in strips (i used about 10 strips)
- 2 Tbsp safflower (kasubha)
- 1 small red onion, chopped
- 5 cloves of garlic, finely chopped (for garnishing)
- 2 cloves of garlic, finely chopped.
- onion spring, finely chopped (for garnishing)
- 1 calamansi or lemon (for garnishing)
- 1 hard boiled egg
- salt and pepper to taste
- olive oil


1. Add some olive oil in a frying pan. Fry the garlic until it's golden brown. Set aside. We will use this for garnishing later.
2. In a pot, heat 2 Tbsp of olive oil.
3. Saute the 2 cloves of finely chopped garlic until golden brown. Add the onions until soft, and then add the ginger until it releases its flavour.
4. Pour 6 cups of water (or vegetable broth). Add 1/2 cup white rice and 1/2 cup of sticky rice.
5. Set the stove to medium heat and let it simmer. Stir occasionally to make sure that the rice doesn't stick on the pot. Add more water if necessary. The goal is to make it look like risotto (but maybe softer). If it gets sticky, just add water.
6. Sprinkle the safflower (kasubha) and stir. Add salt and pepper according to your taste.

To serve:
Scoop the arroz caldo in a bowl. Sprinkle the toasted garlic (oil drained) and spring onion.Cut the hard boiled egg in half and put it on top. Serve with calamansi or lemon slice. Add a dash of pepper if you wish!

Best matched with fried tofu.

Read more...

The Veat Meat + Ensaladang Talong

>> September 28, 2011

Mark is always on the look out for meat alternatives every time we are doing our grocery shopping. Here's one of his new discovery.

Veat Pandan Chicken Style.
Image from : Kawan Food
The Veat alternative meat products are soy-based. We tried the Pandan Chicken Style. It can be deep fried, baked, or just microwaved. My cooking time last night was consumed by my eggplant grilling so the pandan chicken style ended up in my microwave.

Taste: It is very flavourful, although, if you hate ginger, this might not suit your taste. The ginger, in my opinion, is very prominent. I hardly tasted the pandan. But pandan leaves are usually flavourful when it's fresh. Since this is frozen, the pandan flavour is not as tasty, so I didn't expect much. The spiciness is just right. It won't make you sneeze.

Texture : It was a bit soft and smooth in my tongue, but I suppose it's because I microwaved it. Maybe if it was prepared in the oven, or deep fried, it will give a better texture.

Overall, I find it yummy. Some soy-based alternative meat products usually taste like soy (well it's made from soy :P), and you can easily tell that it is fake meat. This usually gives people a hard time to transition to a vegetarian life style - if you know you are eating fake meat, plus it taste super fake. I guess, if you are just getting started to go vegetarian, it's important to find tasty and flavourful meat alternatives so you don't easily crave for the real one. Well, until you are used to no meat at all. The Veat pandan chicken style seems to work for me.


I matched it with ensaladang talong (eggplant salad) and garlic fried rice. Here's the recipe for ensaladang talong:
Ingredients
- 3 medium size eggplants
- 1 Tbsp honey
- 3 chopped tomatoes
- 1 small white onion, chopped
- 2-3 Tbsp of vinegar
- salt and pepper to taste

1. Grille the eggplants, until it's blistered and sort of burned in the outside. Set aside and let it cool down.
2. When it's cold enough to touch, remove the outer skin. Remove the branch and top head.
3. Mash it on a mixing bowl.
4. Add the chopped tomatoes, onions, vinegar and honey. Add salt and pepper to taste.
5. You may add more vinegar according to your taste, if you like it more sour.

Serve chilled.

Read more...

Vegetarian Burger

>> September 13, 2011

My dear husband has recently publicized this blog to almost everyone he knows, and took the liberty to make me a facebook page for my home cooking. I know, he's my biggest fan (because he have no choice but to eat what i cook :P), I really am flattered and I feel like saying "awww", but at the same time I feel pressured now to update as often as I can as well as to make quality postings!

Here's a vegetarian patty recipe that's tasty, even a non-vegetarian would enjoy!

Ingredients :
1 cup dehydrated mock ground meat (soy based grains)
1/4 cup fresh coriander, finely chopped
1 small carrot, grated
1 medium white onion, finely chopped
4-5 pcs swiss brown mushrooms, finely chopped
1 small red bell pepper, finely chopped
1 large egg
1 tbsp. butter
1/4 cup all purpose flour
1 tbsp cumin
salt and pepper to taste
Arugula
pickled green pepper, sliced
honey-mustard sauce


1. Put the dehydrated ground meat (soy based grains) in a bowl. Pour hot water until completely submerged.
2. When it's soft enough, drain the excessive water and put it in a mixing bowl.
3. Toss the grated carrot, onion, coriander, bell pepper and swiss brown mushroom and mix well. At this point you can also add the cumin, about 1/2 tsp of salt and pepper (according to your liking).
4. Divide the mixture in to two. Keep half of the mixture in the freezer. We will only cook half of it as it makes about 5 patties.
5. Add the egg and butter.
6. Sprinkle the 1/4 cup of flour. The flour's purpose is to hold together the mixture. If 1/4 cup is not enough, add flour gradually until you reach the desired firm texture to mold the mixture.
7. Prepare your frying pan and heat oil.
8. When the oil is hot enough, make a ball out of the mixture and put it in the pan. Flatten it with a spatula.
9. Turn the patty to the other side when it's golden brown and ready.

I usually cook in low heat so i can evenly cook the inside of the patty as well as not to burn the outside.

To serve:
1. Toast your burger buns.
2. put a good amount of arugula on the base. Top it with the burger patty.
3. Spread some honey mustard on the patty and top it with the pickled green peppers.

Don't be afraid to free style. You can put fresh onions, caramelized onions or tomatoes. Guacamole also works as a dressing for the burger if you want to skip honey-mustard.

Read more...

Sweet Potato for Breakfast

>> September 8, 2011

As usual, when I run out of ideas of what to cook, I food hunt in my favorite food blogs. This morning's breakfast, I was in the mood for something simple. I found Potato Latkes recipe and was immediately inspired to make one. On a side note, my husband loves sweet potato so I replaced the ingredient with sweet potato instead. I am not too crazy about sweet potatoes because of a childhood myth I grew up with that it makes you fart like crazy. A lot of sweet potato lovers might probably object, but like I said, it's just a myth - with or without sweet potato, we will fart. It's just my mental issue.


Ingredients:
- 1 cup (packed) grated sweet potato
- 1 large beaten egg
- 1 small white onion, minced
- salt and pepper to taste

1. Squeeze the grated sweet potato and remove the excess liquid in it.
2. Put all the ingredients in a bowl and mix well. Add salt and pepper according to your liking.
3. Heat pan with cooking oil.
4. Pack a tablespoon with the mixture and put it in the pan. Cook for about 3 minutes or when its golden brown. Turn to the other side when ready.

1 cup makes about 5 small pieces. If you wish to make more, the proportion of grated sweet potato and beaten egg should be 1:1. The egg is present just to hold it together. We wouldn't want the egg to overpower the flavor of the sweet potato. You can serve it with ketchup, or sour cream as a dip.

Read more...

Baked Herbed Vegetables

>> September 1, 2011

I've been thinking of herb usage since my mini herb garden's been blooming. I always feel bad to trim them and then not able to use them. So this evening, while I was cleaning up the fridge, an idea came - that is to make a vegetable side dish, infused with herbs.

This vegetable side dish is a great partner for the vegetarian meatballs I prepared together with it.

Ingredients:
- small broccoli flower head, chopped and washed
- 1 small carrots, sliced in circles
- 1 medium yellow bell pepper, chopped in big chunks
- Baguio beans, cut it in half if it's too long. You may also use french beans.
- 2 tbsp of corn kernels
- 3 tbsp of extra virgin olive oil
- 2 tsp fresh oregano leaves
- a few sprigs of fresh rosemary
- a few sprigs of thyme
- salt and pepper
- 1 tbsp butter (optional)


1. Toss all the vegetables in a mixing bowl.
2. Sprinkle the olive oil and herbs. Add salt and pepper according to your taste and set aside for 15 minutes to marry the flavors.
3. Preheat oven to 200 C.
4. Make a bag out of aluminum foil and put the vegetable mixture, including the marinade in it. You may add about a tablespoon of butter.
5. Seal it and put it in the oven. Bake for about 15 minutes. Make sure you do not overcook the vegetables inside. I love the carrots when it's still crunchy :).


Read more...

Eggplant Sandwich

>> August 18, 2011

Getting back on the healthy eating track, I made a simple eggplant sandwich for dinner - healthy and tasty.

Ingredients:
- bread, preferably whole wheat
- 2 eggplants cut in 3 parts and then lengthwise
- slices of swiss brown mushrooms
- fresh romaine lettuce
- Salsa (optional)
- fresh tomato slices
- slice of mozzarella cheese
- salt and pepper to taste


1. Grill the eggplants. If you have no time to grill, you can also fry it but blot the eggplants with paper towels to remove the excess oil.
2. When cold enough to handle, sprinkle a bit of salt,pepper, and spanish paprika on both sides. Set aside.
3. Saute the mushrooms and sprinkle it with a bit of salt and pepper. Set aside.
4. Toast your bread.
5. Put the lettuce on the bread, then top it with the eggplants. Then put the salsa or tomato slice, mushrooms, and then the slice of mozzarella cheese.


I think this recipe works better in panini style.


Read more...

Grilled Vegetables with Rice Noodles

>> August 16, 2011

OK, I want to begin this blog entry by saying that this vegetarian dish is a blockbuster! We had this 2 nights in a row and we seemed we can't get enough of it, I did it again in the same week. A week after, I cooked it again, twice on a separate occasion for friends who came over for dinner - and both gave 5 stars! Thanks to Natalie Ward, the owner of Cook Eat Live Vegetarian, for sharing this wonderful vegetarian dish! Her blog is always my avenue for yummy vegetarian recipes - and also worth to mention that her blog is a huge inspiration to me to live a vegetarian lifestyle.

We Filipinos love our meat so much, and we will make a way to put meat in every dish even when not necessary :P. We ordered vegetable fried rice once, only to find bits of ground pork in it. My caterer for a post wedding family luncheon, served pancit with seafood - when I specifically asked them to remove all meat in the pancit during our food tasting. When I complained, they said "Maam, there's no meat, we removed it". Apparently, they thought the word "meat" only refers to pork, chicken, and beef - but not seafood. It's disappointing that even the manager didn't have an understanding of what vegetarian food is. There are soups served in some restaurants, that the food servers thought vegetarian, and then you'll eventually find out it's not since you can taste the beef/pork/chicken broth cubes used in it. In short, I find it quite a challenge to become a vegetarian here, due to lack of vegetarian options in the menu of the majority of restaurants here, not to mention lack of vegetarian information.

See, there's a common misconception about going vegetarian (at least where I come from), and that is to become a goat. Meaning, you only eat green leafy vegetables, and those chunky, juicy ones. Being vegetarian means giving up the delicious food around you. These are examples of the many reasons why most people are discouraged to go vegetarian, and I perfectly feel and understand - it's not easy to give up meat. However, one thing that's not realized is that vegetarian food are nutritious and yummy too - you just have to know what to cook and collect as many variations of recipes as you can!

I'm not 100% vegetarian, but I make a point to eat vegetarian at least 5 times per week, or only when there's no vegetarian option when we eat out. My husband, however, is really working hard and would really refuse meat at all times - which of course, pushes me to cook all vegetables when we are at home, and motivates me to eat vegetarian when we are out (if guilt trip is considered as a form of motivation).

OK, too much blah blah! On to the recipe!


Ingredients:

For grilled vegetables :
- 1 large broccoli head, stem discarded, cut in to bite size.
- french beans, ends trimmed
- Swiss brown mushrooms, washed and sliced
(note: the amount of the vegetables will depend on how much vegetables you'd like to top/mix with your noodles, so just estimate)

For noodles:
- 250g rice noodles, egg noodles, or vegetable noodles.
- 4 garlic cloves, thinly sliced.
- chili powder
- sesame seeds
- 2 Tbsp of soysauce + 1 Tbsp honey mixture
- 1 Tbsp vegetarian oyster sauce (or the regular if it's not available)
- 75ml olive oil
- 3 Tbsp of olive oil
- fresh coriander, coarsely chopped
- lemon wedges
- salt and pepper to taste


Noodle preparation:
1. Cook the noodle according to the instructions found in the packaging. Set aside.

Preparing the vegetables:
1. Boil salted water in a pot.
2. Blanch the broccoli and french beans for exactly 2 minutes. Be careful to not over boil.
3. Drain the vegetables and then soak it in cold water to shock it so it stops from cooking. Drain when it's cold.
4. Spread the vegetables on a clean towel to dry it.
5. Get a large mixing bowl and toss the broccoli, french beans, and then swiss brown mushrooms with 3 tbsp of olive oil. Sprinkle salt and pepper to taste.
6. Heat a griddle pan (or whatever grilling tool you have) on high heat for 5 minutes and start grilling the vegetables. Do this in a batch so it's not too crowded in the pan. Make some nice char marks on each side of the veggies.
7. Once done, set aside.

Preparing the vegetable toppings:
1. Heat the 75ml of olive oil in a sauce pan.
2. Fry the garlic slices until they are golden brown. Do not burn, else it will taste bitter.
3. Sprinkle sesame seeds.
4. Remove from heat and pour it on the vegetable. Toss well.
5. Add salt and pepper to taste.

Stir frying the noodles:
1. Heat 2 tsp olive oil in a large wok over a medium high heat.
2. Add in the cooked noodles, the soy sauce + honey mixture, and oyster sauce. Mix well.
3. Sprinkle chili flakes.
4. Pour the vegetable mixture (including the oil) and toss it well with the noodles.

To serve:
Get a bowl, fill it with the noodles and vegetables. Sprinkle fresh chopped coriander and serve with a lemon wedge. Best when you eat with chopsticks!

I did some improvising in the recipe since I didn't have sesame oil and chili when I cooked this dish. I also added mushrooms just because I love mushrooms :). You can get the original recipe from Cook Eat Live Vegetarian blog.


Read more...

Finally, Married and Happy!

>> August 9, 2011

Photographed by : JM Abania, the coolest, most creative, and far one of the best (aside from my hubby hehe)photographer of all time!

Will be back to blogging business next week, to tell more about the wedding, the people behind our successful celebration, and of course back to two of my favorite things in the world - FOOD and photography :).


Read more...

I'm Officially On Leave

>> July 13, 2011

The month of July is going to be extremely busy so I'm announcing my leave of absence from food blogging.

I'm getting married!!!

Since Mark and I have taken a year to procrastinate in planning, we are now paying the price of the delay - cramming. We have always pictured a simple and intimate gathering, far from the traditional wedding. But planning a simple celebration wasn't as simple as we thought it would be. Budget, invitations, guests, ceremony, venues - all these things we have to take care of in a very limited time. So wish us luck :)

I might post wedding updates here and there - and maybe, if you like to cram like us, you can get an idea how to plan a wedding in less than 2 months.

Read more...

Avocado Smoothie

>> June 30, 2011

For a load of fiber.

I'm recently following a new breakfast scheme - having a full glass of fruit shake for breakfast every other day. I alternate between having a normal breakfast and then just fruit shake the next day. This scheme seems to work pretty well for me to help me lose some unwanted fats. But just a reminder, if you want to put yourself on a diet, make sure you don't starve yourself. Starvation is never healthy.

If you love your pancakes swimming in syrup, or your bacon and eggs in the morning, try to replace it with fresh fruit shake and a low-fat breakfast cereal. Alternate between your normal breakfast menu and your diet menu - it helps.

So today's fruit shake is avocado smoothie - a tropical fruit that's known to be rich in fiber. It's also packed with carbs so I have the energy I need for my morning tasks.


Ingredients:

- 1 ripe avocado
- 1 cup soy milk
- 1/4 cup honey
- 8 cubes of ice

1. Slice the avocado and scoop out the flesh, discarding the seed.
2. Put everything in a blender and blend. Add more honey if necessary.

Serves 2.

Read more...

Tika's Take On Filipino Buko Salad

>> June 25, 2011

Here's the much awaited first ever featured post in this blog by Tika Hapsari Nilmada, a foodie, food photographer, a friend, and a cat lover (like me). I wrote a short introduction - turned long that I decided to put it on a separate post(click the link to read). Thanks Tika for guesting on my blog :).


Marvie is one of my foodie blogger friend whom I met through Flickr. It's funny how I can find nice and talented people from around the world who has the same passion as I am in cooking and food photography. This is what I called "Circle of Friends". No matter who you are and where you are, we still can be friend, though we've never met physically before. I have known Marvie for less than a year, but we get closer through our works on Flickr, blog, Facebook and Twitter. See what internet has done for us, makes the world is on your finger.

Aside that we share the same passion in food photography, we also work as QA Software Engineer (in two different companies) and we are cat lovers !!! What a coincidence. Nice one :D And to give some respect and appreciation to my dear Philippines friend for our friendship, I volunteered myself to write something on her blog as a guest post.

Honestly, I knew nothing about Philippines foods until I found Philippines recipes on a food magazine in Indonesia. So, I picked the easiest recipe, Buko Salad ! Buko means coconut. It's the most famous fruit salad in Philippines. The main ingredient of Buko Salad is young coconut flesh. You may also add more fruits to the salad. Anything you like according to your taste. Coconut in salad ?! Have you ever tried ? A bit creamy, sweet, fresh all goes perfectly well in one spoonful of it. Me love it and my hubby looovvveeessss it !! (you can imagine how he loves the salad :p)

Before we go to the recipe, I want to thank Marvie for giving me the opportunity and let me write something for her blog. I would love to have her to write something on my blog as well. Indonesian food, perhaps :) Please come and see my other recipes on my blog (http://cemplangcemplung.blogspot.com). It would be my honor to see you there.

Buko Salad

Ingredients :

- 1 can of fruit cocktail (about 250 gr), drained
- 250 gr young coconut flesh, shredded
- 200 ml heavy cream
- 3 tbsp sweet condensed milk
- 250 gr grapes, cut in half
- 200 gr cantaloupe, shredded

How to :

Combine and mix thoroughly all the ingredients in a bowl. Chill in the fridge before serve."


Read more...

A Special Guest Post From Tika

I'm very excited to share with you the recipe and photographs of Tika's take on Buko Salad, a Filipino traditional dessert that's always found on the table of typical Filipino families during town/barrio/baranggay fiestas, Noche Buena (Christmas eve dinner), and Media Noche (New year's eve dinner).

A bit of background :

I stumbled upon Tika's photos in Flickr while I was researching about food styling in general - and that's where we first met and became friends. Technology rules! From then on, I kept myself up to date with her Flickr and blog posts - learning from her tips and techniques, and at the same time being acquainted to Indonesian cooking.

Aside from being a good cook, she's also a very talented food photographer. Tika has a great eye for composition and framing, and I have always admired her taste in layout and lighting. If you have a passion for food and starting to cultivate that food photographer in you, I would definitely suggest that you visit her food photography blog too, where she shares tips, her techniques (with visuals, I must mention!) and tools, and funny stories when she makes food photographs (my favorite hehe). I bet you'd learn a lot from it ;).

So enough about my blah blahs and let's go down to business.

Tika, thank you so much for dedicating this recipe to me :) I really appreciate it! And I'm very glad to hear that you and your hubby enjoyed the Buko salad experience!

Read more...

High Fiber Diet Project

>> June 24, 2011

Aside from bringing back the old sports and physical activities I used to do 2 years ago, lately, I also took some time to asses how healthy my cooking is. I mostly cook vegetables than meat but still, I feel like I'm still not eating right. Actually, I was alarmed that I could hardly fit myself in my shorts, pants, and xs clothing. I partly happy because I've been struggling to gain for years. As much as from XS I am now S, I then, should and must remain S. My waistline is now 27, and although my arms, thighs and legs doesn't look fat, it's accumulating right at the middle - my belly :P. I don't look fat, but I'm definitely getting there. I figured, it's easier to work on those extra fats now than 120 lbs. later. I'm 5 feet tall and my frame is small so I can't really gain that much, else I'd look like Doraemon.

So I reviewed my food intake. I realized that I should also watch the food I eat when I'm not home. I realized that although I rarely eat red meat when either I'm at home or out with friends, I eat a bunch of crap with them. I am also deeply inlove with rice. And if I order out or cook my favorite Filipino dishes, I can consume 2 1/2 cups of rice. It's not too often, but I feel like it's often enough to make me gain. So now that I'm a few pounds over my ideal weight, I figured I should start getting a bit conscious of the food I cook and eat out.

So my menu for the rest of the week will be high fiber food and lots of fruits and vegetables. I will also lessen the amount of salt I use in my cooking (I love salty food), and salty food causes water retention in your abdominal area. Not that I'm vain, but I still wish to see myself next summer in bikini without feeling uncomfortable and conscious :P.

So let's see what healthy stuff I can come up with this coming days!

Read more...

Welcome New Food Crew

>> June 20, 2011


I went to the mall to go to an alteration shop for my dress, and to get my favorite stilettos fixed - but ended up geeking out in the department store home section for interesting plates and nice glasses plus cute forks. So here's my new crew which will grace my foodies soon!

Read more...

Not Your Ordinary Lemonade

>> June 12, 2011

I recently discovered Two Tarts, another food blog that was introduced to me by my colleague in Articulate which is being maintained by his wife. Very impressed with the photography, I browsed for more pages until this recipe caught my eyes. I immediately fell in love with the idea of lavender on lemonade. I patiently waited for the weekend, but at the same time, I was obsessing about the lavenders. I remembered I saw lavender plants at some sort of market around here but didn't buy once since I don't really know what to use it for. So I went out the next day after reading the recipe to hunt for dried lavender flowers. Unfortunately, I couldn't find one - but later on realized that I wasn't looking hard enough.

On Saturday, I visited the Saturday market close to our house with hopes to find dried lavender flowers. It's a specialty market that sells organic vegetables, and hard to find food items. And there, I finally found my dried lavender :). Luckily, I also found lavender plants so I grabbed them as well ;).

Thanks to Two Tarts for sharing this wonderful lemonade drink, we totally dig it! Lavender was indeed a great addition to a yummy lemonade. I just love the flavor, and the scent. I can smell it in my head hehe.


Ingredients:
- Tbsp. dried lavender flowers (you can get it at Salcedo Market on Saturdays, from Spices and Flavors at PHP150 for 50g)
- 1 cup freshly squeezed lemon juice (I used 5 standard sized lemons)
- 1 cup honey
- 2.5 cups water
- Additional 2 cups of water


1. Heat 2.5 cups of water and honey in a pot and bring it to a boil. Stir occassionaly to ensure that honey dissolves.
2. Stir in 1 tbsp. dried lavender and remove from heat. Let it sit in for about 20 minutes, or when it's cold enough.
3. Strain the mixture and transfer it to a pitcher.
4. Add the 1 cup lemon juice and 2 cups of water.

Serve with lots of ice.

You can find this recipe with lots of beautiful photographs of the preparation process at www.two-tarts.com.


Dedicating this drink to the new member of my herb garden :).

Read more...

Arugula in Your Omelette

>> June 11, 2011

Inspite of the vast range of breakfast meals, I almost always end up with eggs. Apart from being high in protein, it's very easy to cook - takes 5 minutes. But eggs everyday can get boring. So since we eat eggs a lot for breakfast, I decided to compile all the eggs breakfast I tried and still cooking in a regular basis and so you can as well try it if you are tired of your normal fried eggs in the morning. Let's give that egg life and justice ;).


Ingredients:
- 2 small eggs, beaten (optional: add milk)
- fresh arugula leaves
- goat cheese, crumbled

1. Heat oil in pan. When it's hot enough, pour the beaten eggs and cook them the way you cook an omelette.
2. When it's almost cook but still wet, lay the arugula leaves on one side.
3. Sprinkle goat cheese.
4. Fold the omelette and let it cook for about a minute, in low heat, or until cooked the way you like.

Serve with a piece of bread.

Read more...

Pasta Vegeta

>> June 8, 2011

When I was young, I was a big fan of Dragon Ball Z. My uncle who used to live and work in Japan used to record the episodes and then send it home so kids in the family can watch it. So even before our local network started to broadcast it, we were already familiar and have watched all the episodes. The only downside was the recordings were in in Japanese, so we kind of learned the story by mere movements of the characters. Funny, but as kids, we were very very satisfied.

Vegeta was one of my favorite characters. I used to associate his name with the word vegetable and thinking it might be connected, until I learned the correct pronunciation of the word "vegetable" . So I'm dedicating this recipe to Vegeta - the villain turned hero who reminds me of vegetables (ve-ge-ta-bols).


Ingredients:
Pasta used : Fetuccini, cooked al dente!

Sauce
- 1 pack tomato sauce
- 1/2 cup water
- 1 long egg plant, chopped in tiny bits
- salt and pepper
- dried oregano
- garlic powder
- dried basil
- 5 pieces swiss brown mushroom, stems removed and sliced
- olive oil

Toppings
- small yellow bell pepper, chopped in to tiny bits
- 1/2 cup zucchini, chopped in to tiny bits
- 1/2 cup white onion, chopped in to tiny bits

1. Boil water in a pot.
2. Prepare a bowl of iced water.
3. Blanch the toppings (yellow bell pepper, zucchini, white onion) in the boiling water for about 30 seconds. Drain and transfer them to the iced water bowl to shock it. Set aside.
3. Heat olive oil in a pan and saute the chopped eggplants. When it is quite golden brown, remove and set aside.
4. Use the same pan and add olive oil again. When it's hot enough, saute the mushrooms until cooked. Sprinkle a little bit of salt and pepper to taste.
5. Heat sauce pan. Add the tomato sauce, 1/2 cup water and bring it to a boil. If you wish to have a thick consistency, add flour to thicken the sauce. I usually dissolve a tablespoon of flour in 1/4 cup water and pour it in. This way I don't have to exert more effort in dissolving the chunks in the sauce.
6. Sprinkle the spices. Add salt and pepper to taste. You may also add sugar if you want a bit of sweetness in the sauce.

To serve:

Get a big plate and pour generous amount of sauce right at the middle. Sprinkle enough egg plant bits. Place the pasta on top of the sauce. Sprinkle the shocked toppings around the pasta and on the sauce. Top the pasta with the swiss brown mushroom. And there, your ultimate vegetarian pasta ;)


smakelijk eten!

Read more...

Help I Have So Much Basil!

>> May 31, 2011

I just trimmed my basil, and I ended up with this:


This is just from one pot. I've got so much I don't know what to do with them. I still have pesto so I can't make more. I need ideas!

Read more...

Panizza, But Not Quite


Panizza Pizza was a love a first sight taste experience.

The very first time I encountered panizza was at C Italian Dining, Angeles City, Pampangga, where we held a film shoot for an AVP project. Panizza pizza is apparently the pride of the house. I'm not a pizza person, and so I didn't know what it was or how it's eaten.

Do I eat it with fork and knife? Do I eat it with my hands? But it's cut in a strip. How can I eat it with glamour like that? What's alfalfa sprouts and arugula doing on the table?

It would be awkward to eat it wrong while you are being filmed, so we asked the kind chef, who prepared all our great food that day, Chef Chris Locher, to tell us how we should execute the eating part :P. So he said, sprinkle the alfalfa sprouts on a strip. Lay the crunchy arugula on top. Roll it. And serve it to your lady like a gentleman.

So we started filming. Mark and I felt awkward at first to be filmed while eating and hearing directions on the sides of what we should do. It was the first time we had an "acting" gig haha! My cheeks where trembling and my hands were tensed. But as soon as I took a bite off that panizza - everything went real and natural. It was so good, I didn't have to act like I like it - because I love it! I think that's the best experience in that entire day of filming. From that moment on, it never left my taste.

This recipe is inspired by Chef Chris Locher's panizza. It's not very close to what he served to us, but this will work for us, for now - until I learn to make my own dough :).

Ingredients:
- a ready made pizza crust (preferrably thin), but if you can make your own dough, do it.
- Del Monte Italian pizza sauce
- slices of ripe tomatoes
- alfalfa sprouts
- baby arugula leaves
- olive oil
- mozarella cheese
- salt and pepper to taste


1. Preheat oven to 200C.
2. Brush the pizza crust with olive oil.
3. Spread the pizza sauce.
4. Spread the tomatoes
5. Sprinkle salt and pepper to taste.
6. Top it with grated mozarella cheese and put it in the oven.
7. When it's ready, slice it in strips, about 1 1/2 inches wide.

To serve:

Step 1: Sprinkle alfalfa sprouts on one strip.


Step 2: Lay some crunchy baby arugula on top.


Step 3: Roll it. (In this case, my pizza crust is too thick to roll so we folded it like a sandwich :P).


Step 4: Munch munch!

Read more...

Another Veggie Evening

>> May 27, 2011


A simple pesto pasta and a nice side salad is perfect for a light dinner. Salad recipe coming up ;).

Eat healthy and have a great weekend everyone!

Read more...

A Taste of Freshness - Mixed Citrus Salad

Not all salad has to have green leafy lettuce. Salads also need not to be strictly all vegetable, or all fruits - you can combine them and it works ;).

I borrowed a citrus salad recipe from Smitten Kitchen, one of my favorite sites to stalk when it comes to healthy food. I must say it is refreshing and it taste superb. It's nice to have a break from green leafy salad I'm so used to (and i super loveee), and go for some juicy, refreshing fruits.


Mixed Citrus Salad. Forgive my mint for looking dry, I forgot to sprinkle the dressing.

Ingredients:
- your own choices of citrus. In this recipe, I have orange, ponkan and pomelo.
- 1 medium red onion, finely chopped
- 1 Tbsp. red wine vinegar or lemon juice
- 1 tsp. dijon mustard
- 1 Tbsp. extra virgin olive oil
- 1 Tbsp. crushed feta cheese
- fresh peppermint, sliced in to strips


1. Peel your citrus using a knife, removing the white pith or until you see the actual flesh of the fruit. It is quite hard to explain how but click here to view a video of how you can peel an orange with a knife.
2. Put your finely chopped onion in a bowl and rest a strainer on top of it. Slice the citrus fruits and put it in the strainer. In this way, the excess juices would fall on the onion to add flavor and to soften it a bit. I also like to squeeze the juice of the "rejects" slices (slices that aren't so pretty :P) on the onion to add more liquid.
3. In a separate bowl, whisk the redwine vinegar (or lemon juice), mustard, olive oil together. Add a dash of salt and pepper to taste. I also like adding a little bit of honey to give it a sweet twist.
4. Get a big flat plate and layout the citrus fruits. Scoop out the red onion and spread it out. Sprinkle the half (if it's a lot) of the juices from the onion bowl too.
5. Drizzle the dressing (red wine vinegar + dijon mustard mixture) all over.
6. Top it off with crushed feta cheese and mint strips.

Bon apetite!

Read more...

Tricolore Omelette and My Breakfast Complement

>> May 17, 2011

I was supposed to take a break from taking food photographs for at least a week because I'd like to stay away from distractions and just give my 100% attention to my testing job. I could only think of the beta version we'll be deploying very soon, and I must say I am getting more nervous and excited each day. Nervous because I don't want to screw it up by missing important areas to test; excited because it's an ass-kicking software which will take the e-learning industry to the next level  ;)

Despite the lack of sleep and rest from working all night, I was feeling inspired to cook and take photos this morning. Yesterday I was stalking reviewing the recipes of Elena, the blog owner of Photogenic Food : Quick and Easy Recipes. I stumbled upon her blog while testing out google search and trying keywords to pull up my newly bought domain, which contained the word "Photogenic". I immediately fell in love with the simplicity, easy to cook/prepare attitude of this blog - not just the cooking part, but how Elena presented these recipes.

Her mozarella and tomato omelette caught my eyes. It reminded me of tricolore salad, one of my many favorites. Inspired by her recipe, I made my personal version (actually i was just pushed to freestyle because I didn't realize I don't have enough eggs to follow her recipe :P ).

So I'm going to call it Tricolore Omelette.

Ingredients:
- 1 egg, beaten
- 1 Tbsp of milk
- 1 small tomato, sliced
- mozarella cheese (grated or thinly sliced)
- fresh basil leaves
- salt and pepper to taste


1. Beat the eggs. Add milk. Sprinkle salt.
2. Heat oil in a pan. When it's hot enough, pour the egg mixture.
3. While egg is cooking, top it with mozarella cheese. If you have thin slices, just distribute it evenly. Make sure you don't put too much as you don't want to overwhelm your omellete with cheese. Distribute the tomato slices as well.
4. When it's ready, or the mozarella has melted, fold the egg just like how you normally fold an omelette.
5. Sprinkle pepper and serve with fresh basil leaves.


On to my second inspiration source...

Mark's first magazine cover was just published! We just got a copy and I'm feeling super thrilled seeing the photos he made published in front page, and all over the magazine. He's had a number of shoots with Monday, but this is the first time he got to shoot the cover, and being on the cover is really something. I feel proud to see Mark's work on a magazine cover - and mind you, it's not just a so-so magazine :). Thanks to Monday for giving Mark this opportunity. Very happy to see that his hardwork - the consistency of delivering high-quality, professional photographs paid off :).  So this morning, Monday Magazine was the perfect complement for my tricolore.

Dingdong Dantes is definitely a yummy breakfast. Aruguuuy! (quoting elvira and iya)

My Pupi is popular :D

Isn't she lovely?

Read more...

Bubble Blahs

I work and live at night time. I am a person deprived of natural light. I rarely cook in the morning as I'm almost always asleep, else busy with house chores. As much as I love natural light in my photography, I'm afraid I don't usually have that luxury, unless I sacrifice my sleep, or make an effort to stay up longer during the day to do a cooking + photo session. So I depend on my flash, and sometimes, available light from my fluorescent bulbs. Although, in my opinion, nothing beats the natural light, I am, so far, satisfied with my shots using my flash that I learned to love.

I always look forward to the weekends for some sunlight.

  © Blogger template Simple n' Sweet by Ourblogtemplates.com 2009. Sponsored by: Website Templates | Premium Themes. Distributed by: blog template

Back to TOP